Introduction
API Monitoring is one of the common use cases of Testfully platform and in this article I will go through the process of defining a health check test, run it manually to make sure it works, configure it to run every 5 minutes and be notified when things go wrong via email.
Most deployed APIs come with a status endpoint which responds with the status of the running API. If you don’t have any endpoint yet, you can use https://httpbin.org/anything so without further ado let’s get started by adding our health check test.
Step #1: Adding the Health Check test
- Login to your Testfully dashboard and click on “New Test” link in left nav bar.
- Leave the “Folder” blank as it’s not mandatory.
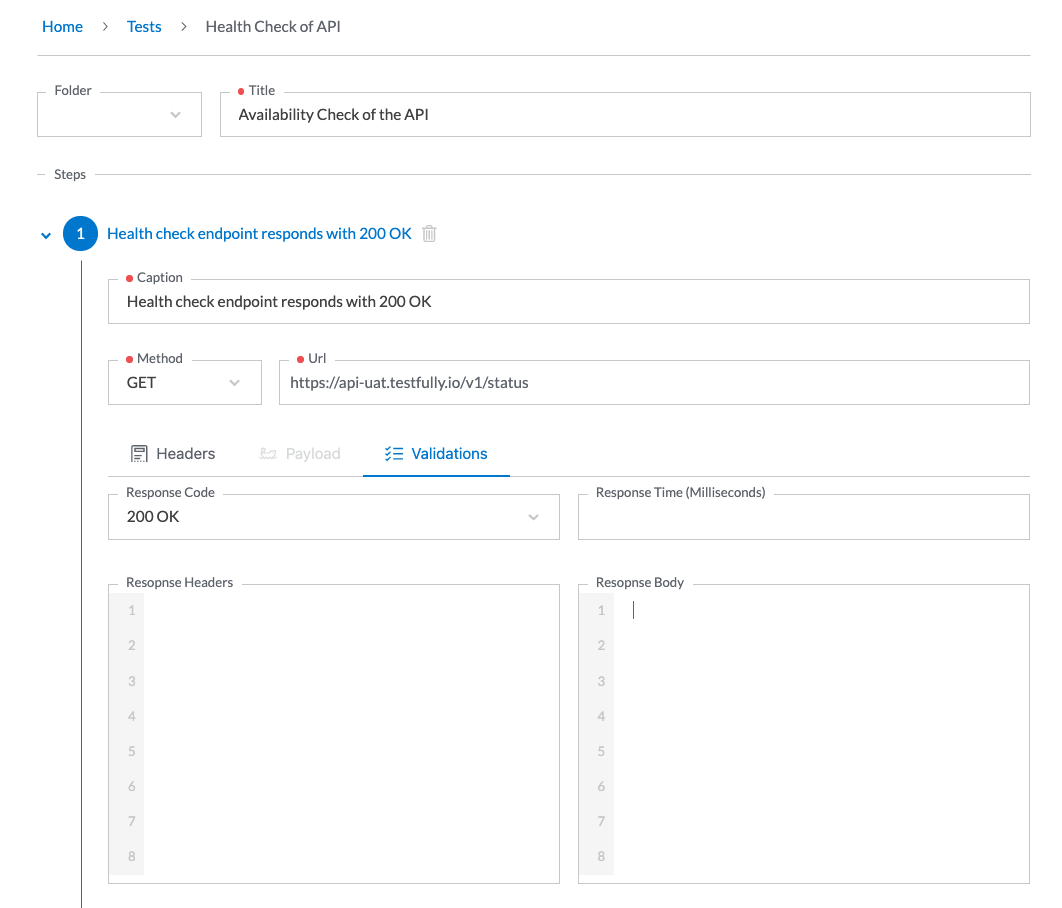
- Write a title for your test, something that explains the purpose of your test in plain words. For example, “Availability Check of the API”.
- Provide a caption for the first step in your test. For example, “Health check endpoint responds with 200 OK”.
- Select the correct method for the endpoint under the test, for example: GET.
- Enter your endpoint URL. For example: https://httpbin.org/anything.
- “Headers” section can be used to add HTTP headers but for our example, we can leave it blank.
- “Payload” tab can be used to add request payload and will be enable for methods that support request body. To keep things simple, we leave it blank.
- “Validations” tab is the most important part, switch to this tab and select “200 OK” from the “Response Code”.
- Click on the “Save” button to add the test.
Below is how I defined my health check test. Yours should be something similar to this one, albeit with different values.
Congratulations! You added your health check test. The next step is to run it manually.
Step #2: Verify your test by running it
Before letting Testfully run our health check in background, we should make sure it works so let’s go ahead and run it manually.
As you probably know, test cases are executed against environments so if you don’t have an environment in your account please follow the below steps to add an environment.
- Click on the “Environments” link in nav bar
- Click on the “New Environment” button
- Pick a name for your environment. For example, “Staging”.
- Click on “Save” to save the new environment.
With the environment out of the way, we’re good to run our health check scenario manually by:
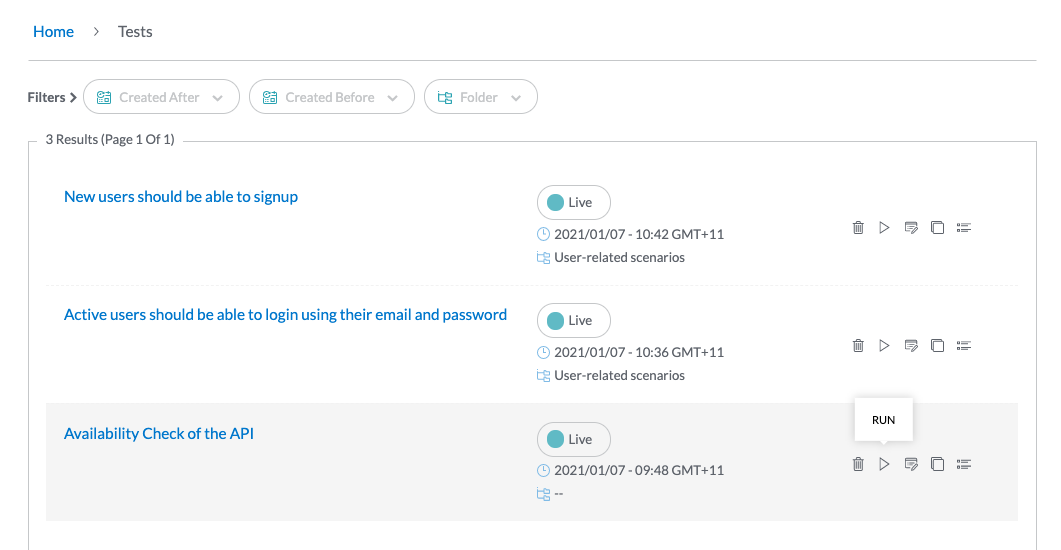
- Click on the “All Tests” link in left nav bar.
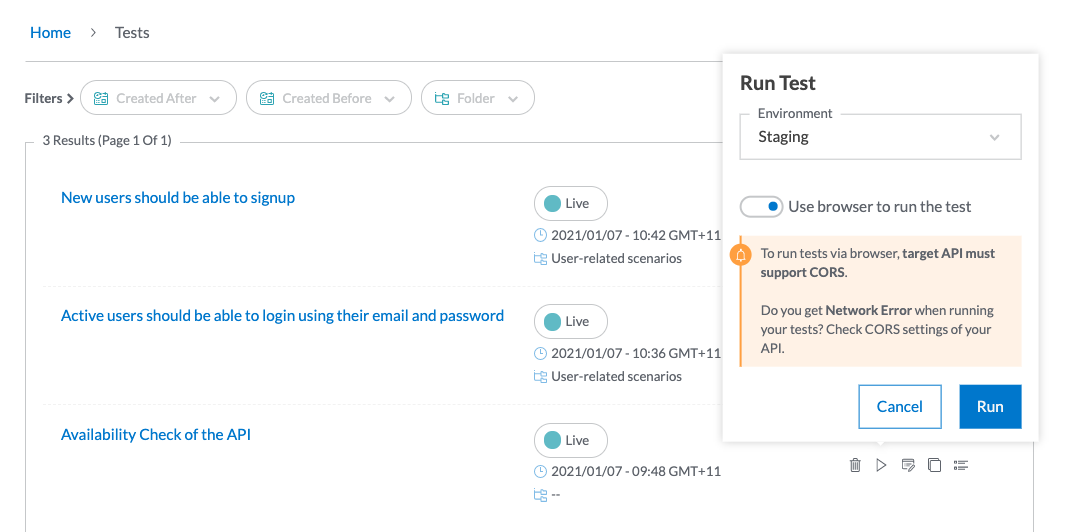
- You should see your health check test here. Click on the little triangle button in last column of that row and pick one of the available environment, then click on “Run”.
- Testfully will run your test and takes you to the result page.
Below is screenshots of the above 3 steps:
Step 1: click on the “Run” button.
Step 2: Run the test case
Step 3: Result Page
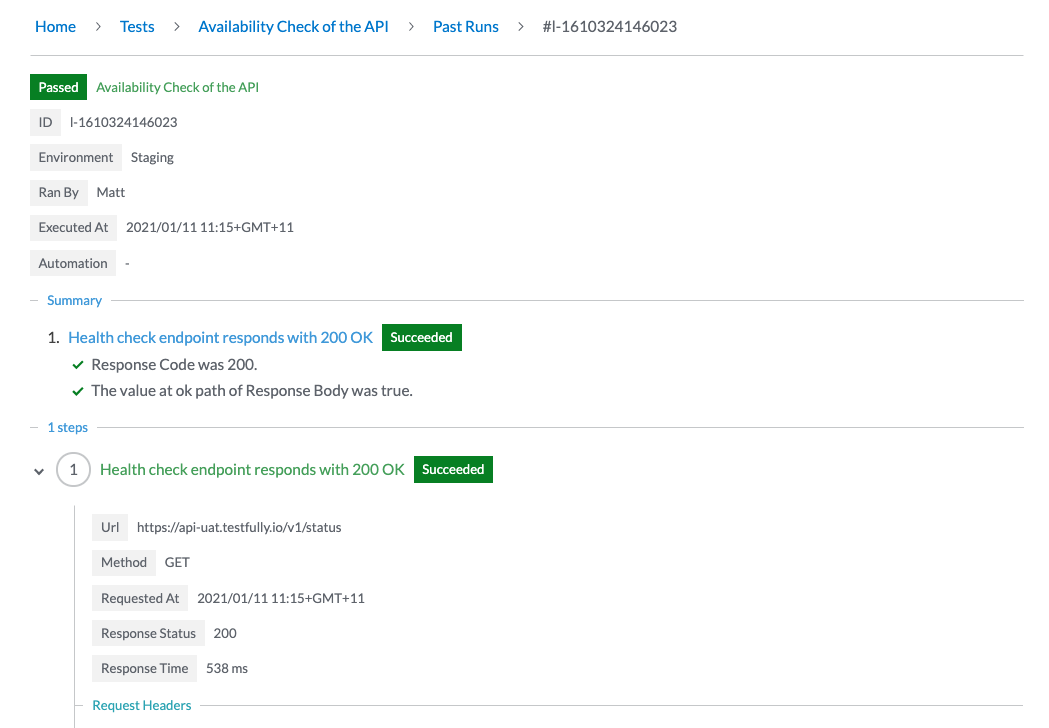
Congratulations. We just ran our test and it works! Let’s take to the next step and run it every 5 minutes.
Step #3: API Monitoring
Now that we got a working health check test in place, we need to configure Testfully to run our test in background every 5 minutes and let us know as soon as the test fails. To achieve this, we need to create a collection, add our test to the suite and add automation to the collection. The good news is that with just a few clicks we can do all of the above so:
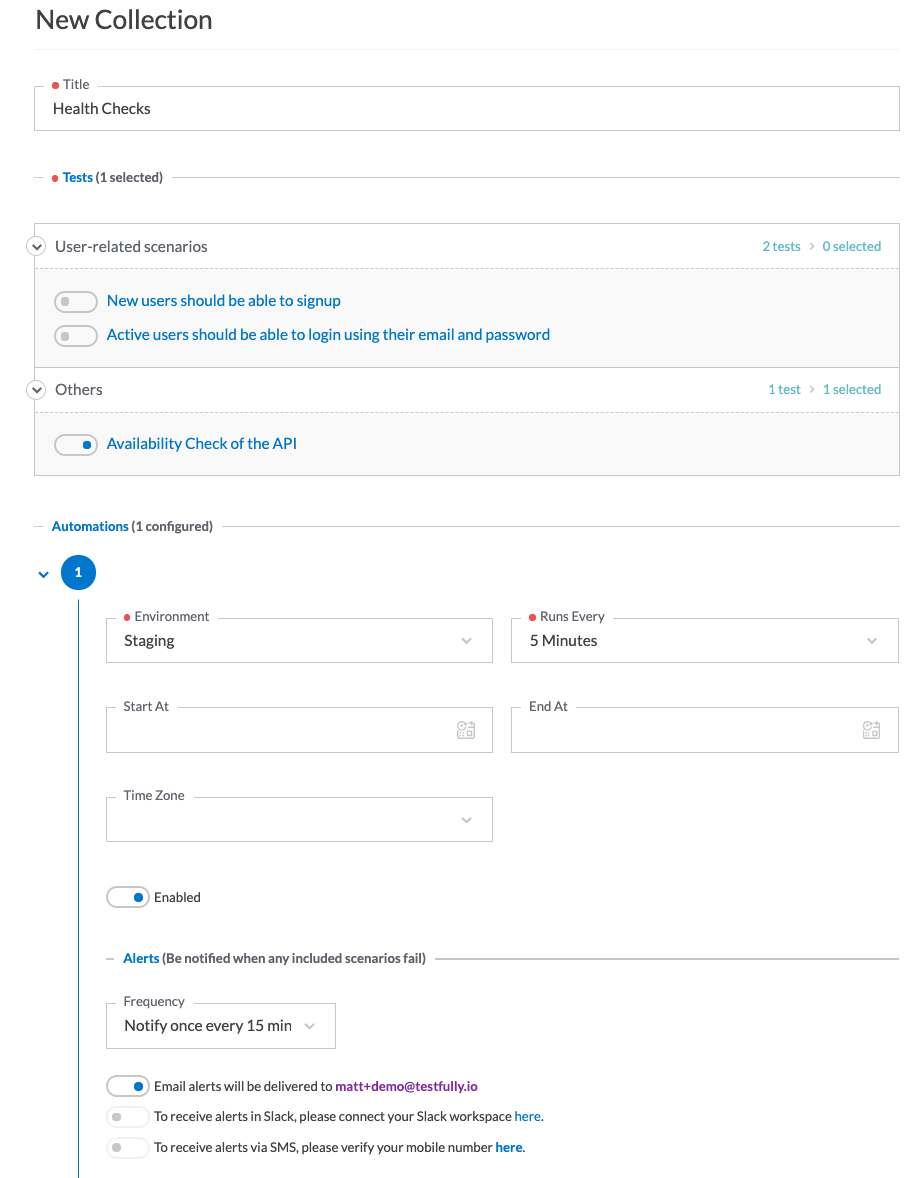
- Click on the “New Collection” in left navbar.
- Pick a title for your collection, for example: “Health Checks”.
- Under scenarios section, find your health check test and enable toggle it on.
- Under Automations section
- Pick one of the available environments.
- Select “5 minutes” as execution interval in “Runs Every” combo box.
- Leave “Start At”, “End At” and “Timezone” blank as we want to run the health check straight away and indefinitely.
- Under Alerts section
- Pick a value for the frequency of alerts. I would go with Notify once every 15 minutes
- Pick the mediums for alerts. I picked “Email” by toggling it.
- Click on the “Save” Button to save the scenario.
- Click on the “All Collections” in left nav bar, you should be able to see the new “Health Checks” suite.
- Click on the “Past Runs” icon (last icon) to see a list of previous executions of the “Health Checks” suite.
The below screenshot is how I completed the collection form.
The new suite showed up in “All Collections” section.
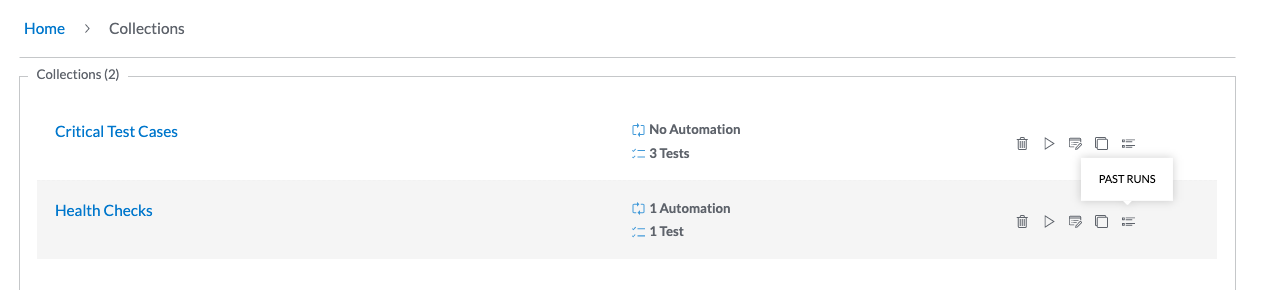
I clicked on “Past Runs” and can see I have already one passed test.

Congratulations! Your collection and automation are configured. Testfully continues to run your collection every 5 minutes till you either delete or disable the suite.